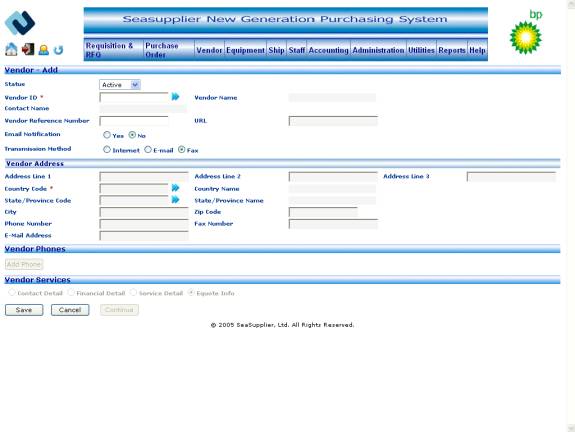
The Add/Edit Vendor screen allows the user to add or edit information on vendors in the SeaSupplier system.
Invoking the screen
To go to the Add/Edit Vendor screen click vendor on the main menu and select the Vendor – Add/Edit option.
Main Menu > Vendor > Vendor – Add/Edit
Screen layout
Figure Add/Edit Vendor
Adding new vendor information or editing existing vendor information
Following data should be pre-populated in the system in order to add/edit vendors–
Vendor ID and Vendor Name
Country Code and Country Name
State Code and State Name
Following fields are mandatory to add/edit vendors–
Vendor ID
The fields on the add/edit screen are:
Status dropdown
Select the vendor status from the Status dropdown. The possible values on the Add Vendor screen are ‘Active’ and ‘Inactive’ and those on the Edit screen are ‘Active’, ‘Inactive’, and ‘Deletion Pending’. The default status while adding a new vendor is ‘Active’.
Vendor ID textbox
Click the button to the right of the textbox to access the Search Vendor Contact popup from where you can select the relevant vendor id or enter a value in the textbox. The pop up displays all the active vendors belong to the customer. Maximum length allowed for the field is 10.
Vendor Name label
This indicates the corresponding vendor name for the vendor id chosen in the earlier step. This value gets populated at the time of selecting vendor id code from the search vendor popup.
Contact Name label
Contact Name automatically gets populated as soon as user selects the vendor id from the Vendor ID popup.
Vendor Reference Number textbox
Enter the vendor reference number in the vendor reference number textbox. The maximum length allowed for the field is 20.
URL textbox
URL automatically gets populated as soon as user selects the vendor id from the Vendor ID popup.
E-mail Notification radiobutton list
You can select the requirement of e-mail notification by a vendor by the e-mail notification radiobutton list. The possible values in the list are ‘Yes’ and ‘No’.
Transmission Method radiobutton list
You can select the transmission method for a vendor by the transmission method radiobutton list. The possible values in the list are ‘Internet’, ‘E-mail’ and ‘Fax’.
Address Line 1 textbox
Address Line 1 automatically gets populated as soon as user selects the vendor id from the Vendor ID popup.
Address Line 2 textbox
Address Line 2 automatically gets populated as soon as user selects the vendor id from the Vendor ID popup.
Address Line 3 textbox
Address Line 3 automatically gets populated as soon as user selects the vendor id from the Vendor ID popup.
Country Code textbox
Country Code automatically gets populated as soon as user selects the vendor id from the Vendor ID popup.
Country Name textbox
Country Name automatically gets populated as soon as user selects the vendor id from the Vendor ID popup.
State/Province Code textbox
State/Province Code automatically gets populated as soon as user selects the vendor id from the Vendor ID popup.
State/Province Name textbox
State/Province Name automatically gets populated as soon as user selects the vendor id from the Vendor ID popup.
City textbox
City automatically gets populated as soon as user selects the vendor id from the Vendor ID popup.
Zip Code textbox
Zip Code automatically gets populated as soon as user selects the vendor id from the Vendor ID popup.
Phone Number textbox
Phone Number automatically gets populated as soon as user selects the vendor id from the Vendor ID popup.
Fax Number textbox
Fax Number automatically gets populated as soon as user selects the vendor id from the Vendor ID popup.
E-mail Address textbox
E-mail Address automatically gets populated as soon as user selects the vendor id from the Vendor ID popup.
Vendor Services grid
All the services offered by the vendor are populated in the grid as soon as user selects the vendor id from the vendor id popup.
To save new vendor information
Click the Save button to save the new vendor information details entered. If all the fields are valid, the system will display a message that the information you have entered has been added to the system and button ‘Add Phone’, ‘Continue’ and radiobutton list containing ‘Contact Details’, ‘Financial Details’, ‘Service Details’ and ‘Equote Info’ gets enabled. Save button gets disabled.
To cancel the operation
Click the Cancel button if you wish to exit the screen at any point without adding a vendor. The system will return you to the Search Vendor screen.
To Add new vendor phone
Click the Add Phone button to add the new vendor phone details.
To Sort information in the grid
You can sort information in the grid by clicking any of the column headers. For example, if you click Type column header, you will sort all the records by Type.
To edit information about a vendor phone
If you need to edit information displayed in any of the rows in the grid below, click the Edit button at the right hand end of the row. This invokes the Add/Edit Vendor Phone where you can edit the information for the selected row.
To Display Equote Info
Click the Equote Info radio button to display vendor Equote Information.
To Display/Add/Edit Service Detail
Click the Service Detail radio button to display vendor Service Details.
To Display/Add/Edit Financial Detail
Click the Financial Detail radio button to display vendor Financials Details.
To Display/Add/Edit Contact Detail
Click the Contact Detail radio button to display vendor Contact Details.
Adding new vendor phone information or editing existing vendor phone information
Following data should be pre-populated in the system in order to add/edit vendor phones–
Phone Type
Following fields are mandatory to add/edit vendors–
Phone Type
Contact Phone
Screen layout
Figure Add/Edit Vendor Phone
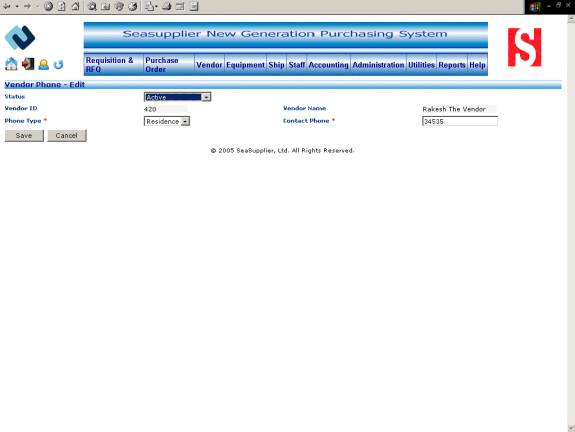
The fields on the add/edit screen are:
Status dropdown
Select the vendor phone status from the Status dropdown. The possible values on the Add Vendor Phone screen are ‘Active’ and ‘Inactive’ and those on the Edit screen are ‘Active’, ‘Inactive’, and ‘Deletion Pending’. The default status while adding a new vendor phone is ‘Active’
Vendor ID label
Vendor ID label automatically gets populated as soon as screen is loaded.
Vendor Name label
Vendor Name label automatically gets populated as soon as screen is loaded.
Phone Type dropdown
Select the phone type from the phone type dropdown. The possible values are ‘Fax’, ‘Mobile’, ‘Office’ and ‘Residence’.
Contact Phone textbox
Enter the contact phone in the contact phone textbox. The maximum length allowed for the field is 20.
To save new vendor phone information
Click the Save button to save the new vendor phone information details entered. If all the fields are valid, the system will return you to the Add/Edit Vendor screen with a message that the information you have entered has been added to the system.
To cancel the operation
Click the Cancel button if you wish to exit the screen at any point without adding a vendor phone. The system will return you to the Add/Edit Vendor screen.
Display Equote Info
Information on all the Equotes for vendors in the system is displayed when the Display Equote screen is opened.
Invoking the screen
To go to the screen click Vendor on the main menu and select the vendor services – Add/Edit -- Equote Info option.
Main Menu > Vendor > Vendor Services – Add/Edit > Equote Info
Screen layout
Figure Display Equote
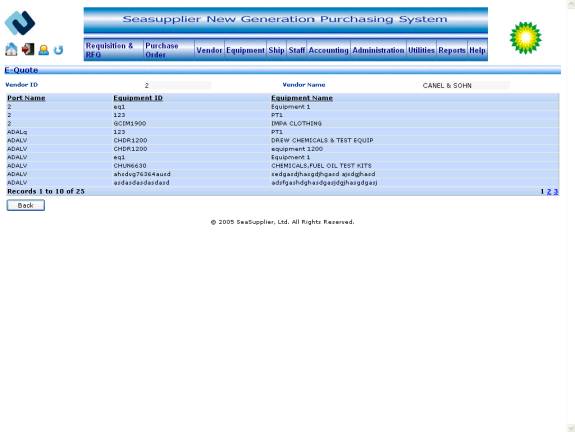
To Sort information in the grid
You can sort information in the grid by clicking any of the column headers. For example, if you click Equipment Id column header, you will sort all the records by equipment id.
Display Service Details
Information on all the Services for vendors in the system is displayed when the Display Services screen is opened.
Invoking the screen
To go to the Display Services screen click vendor on the main menu and select the Vendor > Vendor Services – Add/Edit -- Service Detail option.
Main Menu > Vendor > Vendor Services – Add/Edit > Service Detail
Screen layout
Figure Display Service Detail
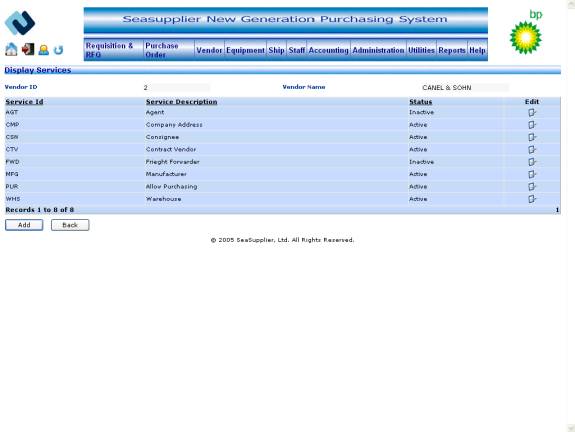
To Sort information in the grid
You can sort information in the grid by clicking any of the column headers. For example, if you click Service Id column header, you will sort all the records by service id.
To edit information about a vendor service
If you need to edit information displayed in any of the rows in the grid below, click the Edit button at the right hand end of the row. This invokes the Add/Edit Service Screen where you can edit the information for the selected row.
Adding new vendor service information or editing existing vendor service information
Following data should be pre-populated in the system in order to add/edit vendor services–
Service ID and Description
Following fields are mandatory to add/edit vendors–
Service Description
Screen layout
Figure Add/Edit 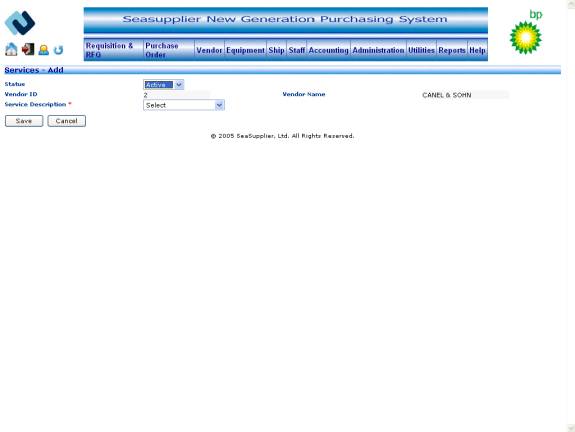
The fields on the add/edit screen are:
Status dropdown
Select the service status from the status dropdown. The possible values on the Add Service screen are ‘Active’ and ‘Inactive’ and those on the Edit screen are ‘Active’, ‘Inactive’, and ‘Deletion Pending’. The default status while adding a new vendor Service is ‘Active’.
Vendor ID label
Vendor ID label automatically gets populated as soon as screen is loaded.
Vendor Name label
Vendor Name label automatically gets populated as soon as screen is loaded.
Service Description dropdown
Select the service description from the service description dropdown. The possible values are ‘Agent’, ‘Allow Purchasing’, ‘Broker’, ‘Carrier’, ‘Company Address’, ‘Consignee’, ‘Contract Vendor’ and ‘Department Address’ and ‘Freight Forwarder’, ‘Hub’, ‘Manufacturer’ and ‘Warehouse’.
To save new Service
Click the Save button to save the new service information details entered. If all the fields are valid, the system will return you to the Display Services screen with a message that the information you have entered has been added to the system.
To cancel the operation
Click the Cancel button if you wish to exit the screen at any point without adding a service. The system will return you to the Display Service screen.
Display Finance Details
Information on all the Financial Details for vendors in the system is displayed when the Display Finance screen is opened.
Invoking the screen
To go to the Display Finance screen click vendor on the main menu and select the Vendor Services – Add/Edit -- Financial Detail option.
Main Menu > Vendor > Vendor Services– Add/Edit > Financial Detail
Screen layout
Figure Display Finance Detail
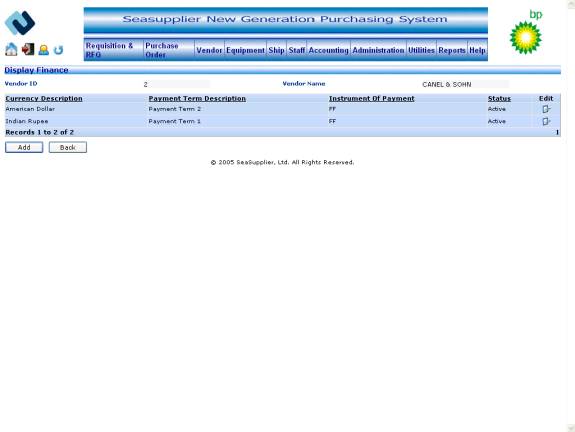
To Sort information in the grid
You can sort information in the grid by clicking any of the column headers. For example, if you click Payment Term Description column header, you will sort all the records by payment term description.
To edit information about a vendor finance information
If you need to edit information displayed in any of the rows in the grid below, click the Edit button at the right hand end of the row. This invokes the Add/Edit Finance Screen where you can edit the information for the selected row.
Adding new vendor financial information or editing existing vendor financial information
Following data should be pre-populated in the system in order to add/edit vendor financial details–
Currency Code and Currency Name
Instrument Of Payment
Payment Term Description
Following fields are mandatory to add/edit vendors–
Currency Code and Currency Name
Instrument Of Payment
Payment Term Description
Screen layout
Figure Add/Edit Finance
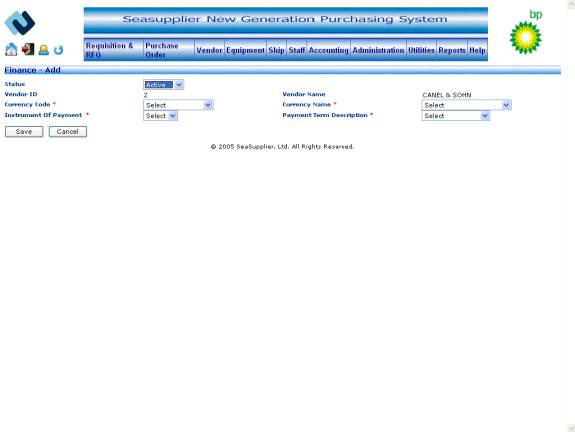
The fields on the add/edit screen are:
Status dropdown
Select the finance status from the status dropdown. The possible values on the Add Finance screen are ‘Active’ and ‘Inactive’ and those on the Edit screen are ‘Active’, ‘Inactive’, and ‘Deletion Pending’. The default status while adding a new vendor Finance is ‘Active’.
Vendor ID label
Vendor ID label automatically gets populated as soon as screen is loaded.
Vendor Name label
Vendor Name label automatically gets populated as soon as screen is loaded.
Currency Code dropdown combo
Select the currency code from the currency dropdown combo. Currency Name gets automatically populated.
Currency Name dropdown combo
Select the currency name from the currency dropdown combo. Currency Code gets automatically populated.
To save new Finance Details
Click the Save button to save the new finance information details entered. If all the fields are valid, the system will return you to the Display Finance screen with a message that the information you have entered has been added to the system.
To cancel the operation
Click the Cancel button if you wish to exit the screen at any point without adding finance details. The system will return you to the Display Finance screen.
Display Contact Details
Information on all the Contacts Details for vendors in the system is displayed when the Display List Contact screen is opened.
Invoking the screen
To go to the Display List Contact screen click vendor on the main menu and select the Vendor Services – Add/Edit -- Contact Details option.
Main Menu > Vendor > Vendor Services– Add/Edit > Contact Detail
Screen layout
Figure Display Contact Detail
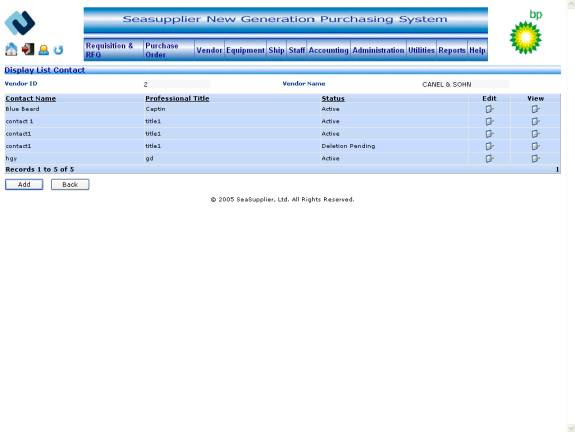
To Sort information in the grid
You can sort information in the grid by clicking any of the column headers. For example, if you click Contact Name column header, you will sort all the records by Contact Name.
To edit information about a vendor contact information
If you need to edit information displayed in any of the rows in the grid below, click the Edit button at the right hand end of the row. This invokes the Add/Edit Contact Screen where you can edit the information for the selected row.
Adding new vendor Contact information or editing existing vendor Contact information
Following fields are mandatory to add/edit vendor contact information–
Contact Name
Professional Title
E-mail Address
Screen layout
Figure Add/Edit Contact
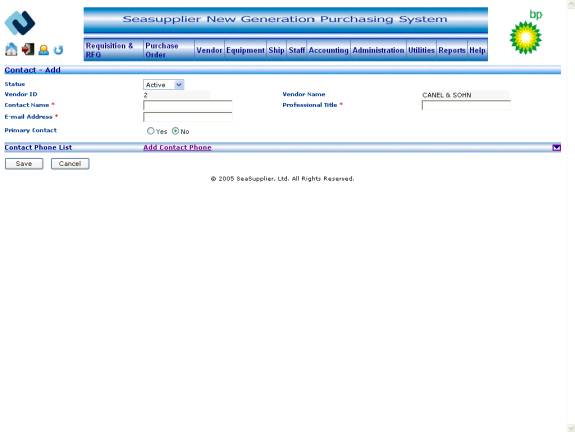
The fields on the add/edit screen are
Status dropdown
Select the contact status from the status dropdown. The possible values on the Add Contact screen are ‘Active’ and ‘Inactive’ and those on the Edit screen are ‘Active’, ‘Inactive’, and ‘Deletion Pending’. The default status while adding a new vendor Contact is ‘Active’.
Vendor ID label
Vendor ID label automatically gets populated as soon as screen is loaded.
Vendor Name label
Vendor Name label automatically gets populated as soon as screen is loaded.
Contact Name textbox
Enter the contact name in the contact name textbox. The maximum length allowed for the field is 40.
Professional Title textbox
Enter the professional title in the professional title textbox. The maximum length allowed for the field is 40.
E-mail Address textbox
Enter the e-mail address in the e-mail address textbox. The maximum length allowed for the field is 100.
Primary Contact radiobutton list
You can make the contact as primary by the primary contact radiobutton list. The possible values in the list are ‘Yes’ and ‘No’.
Add Contact Phone link button
You can add new contacts phones for a vendor by clicking on Add Contact Phone link button. When you will click on the Add Contact Phone link button a popup is opened.
To save new Contact
Click the Save button to save the new contact information details entered. If all the fields are valid, the system will return you to the Display Contact screen with a message that the information you have entered has been added to the system.
To cancel the operation
Click the Cancel button if you wish to exit the screen at any point without adding contact phone. The system will return you to the Display List Contact screen.
To Add new Contact Phone
Click the Add Contact Phone link button to add the new contacts phone information details entered.
The fields on the popup are:
Status dropdown
Select the contact phone status from the status dropdown. The possible values on the Add Contact Phone screen are ‘Active’ and ‘Inactive’ and those on the Edit screen are ‘Active’, ‘Inactive’, and ‘Deletion Pending’. The default status while adding a new vendor Contact phone is ‘Active’.
Vendor ID label
Vendor ID label automatically gets populated as soon as screen is loaded.
Vendor Name label
Vendor Name label automatically gets populated as soon as screen is loaded.
Contact Name label
Contact Name label automatically gets populated as soon as screen is loaded.
Phone Type dropdown
Select the phone type from the phone type dropdown. The possible values are ‘Fax’, ‘Mobile’, ‘Office’ and ‘Residence’.
Contact Phone textbox
Enter the contact phone in the contact phone textbox. The maximum length allowed for the field is 20.
To save new Contact Phone
Click the Save button to save the new contact phone information details entered. If all the fields are valid, the system will return you to the Add/Edit Contact Phone screen with a message that the information you have entered has been added to the session in the grid.
You can perform sorting in the grid on column headers.
To cancel the operation
Click the Cancel button if you wish to exit the screen at any point without adding contact phone. The system will return you to the Add/Edit Contact Phone screen.